How to Choose the Best Welding Automation in 2026
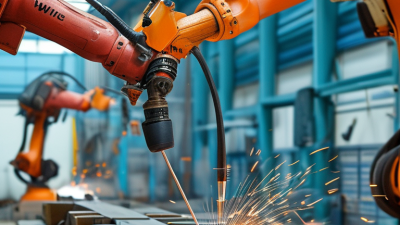
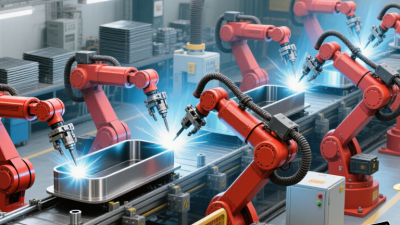
Choosing the best welding automation in 2026 is not simply a matter of buying a faster robot. It means matching equipment to the joint, material, production volume, and skills of the people running the cell. A robotic arm may look impressive on the shop floor. But inconsistent fit-up, frequent changeovers, or poor fume extraction can quickly erode its value.
The International Federation of Robotics’ World Robotics 2024 report counted 4.28 million industrial robots operating worldwide in 2023, with 541,302 new installations that year. These figures describe industrial robots broadly, not welding systems alone. Still, they show how established automation has become. IFR President Marina Bill described the global operational stock as reaching “a new record of about 4.3 million units.” For welding teams, that scale makes careful selection more important, not less. A system must fit the actual work—not just a compelling sales demonstration.
This guide examines process compatibility, cobots versus traditional robots, safety, programming, integration, and total cost of ownership. It also asks harder questions: Can the cell handle the smallest part in your mix? How long does a recipe change take? Who will troubleshoot it at 2 a.m.? Small details matter. A torch angle, cable snag, or poorly placed fixture can stop production. No automation choice is perfect. The aim is to identify the trade-offs early, verify vendor claims with representative weld trials, and choose a system your team can maintain as production changes.
Define Production Needs and Welding Requirements
Define the production problem before comparing automation. Record weekly part volume, shifts, takt time, and actual arc-on time. Separate repeat work from urgent repairs and short-run variants. A cell built for steady batches may struggle with frequent changeovers. Measure the work.
Then document welding requirements at the joint level: process, material grade, thickness, position, weld length, tolerance, and inspection method. Note access limits, fume extraction, fixture loading, and how parts vary in real production. A neat drawing can hide a crooked edge or awkward torch approach. Those details matter.
The International Federation of Robotics reported 541,302 industrial robot installations worldwide in 2023, in World Robotics 2024. That broad figure shows automation’s scale, not whether a welding cell will pay off in your shop. Build a baseline using cycle time, rework, scrap, and downtime; compare it with a realistic pilot. Forecasts are often wrong. Leave room for that. Ask operators where setup slows down, and test representative parts—not just the easiest sample—before finalizing specifications.
How to Choose the Best Welding Automation in 2026
Define production needs and welding requirements
Typical approximate electrode or wire deposition-rate ranges are shown in kilograms per hour. Actual rates vary with material, joint design, position, consumable, and operating settings; deposition rate is not the same as finished-part output. Use your required weld size, annual volume, and available production time to assess whether automation is appropriate.
Evaluate Compatibility, Safety, and Workforce Needs
Choosing welding automation in 2026 starts with the parts you actually make, not the machine’s advertised speed.
Check whether the system can handle your materials, joint designs, weld positions, and required tolerances. A fixture that shifts slightly can create inconsistent seams, even when the welding parameters look correct. Confirm that the power source, torch, sensors, and control system work with your existing equipment. Measure aisle width, cell footprint, and space for fume extraction before planning installation. Small details matter.
Safety needs practical review on the shop floor.
Look at guarding, interlocks, emergency stops, and safe access for setup and maintenance. Fume extraction should suit the materials and welding processes involved. Ask operators and maintenance staff to test the workflow, including loading parts and clearing faults. A system that is safe only when nobody needs to adjust it is not ready. People matter, too.
Workforce needs shape long-term performance.
Identify who will program jobs, inspect welds, maintain equipment, and train new operators. Provide hands-on practice with real parts, not only a classroom demonstration. Run a pilot using both typical and awkward jobs, then track rework, changeover time, downtime, and operator feedback. One easy part can make a system look better than it is. That is worth admitting before committing to a full production rollout.
Calculate Total Cost and Expected Productivity Gains
Choosing welding automation in 2026 means pricing the whole production change, not just the robot or welding cell. Include fixtures, integration, guarding, operator training, programming, utilities, consumables, and planned maintenance. Ask for replacement-part costs and realistic service intervals. Downtime has a price, too. Estimate annual operating costs using your own shift pattern and expected utilization, rather than a supplier’s best-case schedule.
Then compare the cost per acceptable part before and after automation. Track cycle time, arc-on time, changeovers, rework, scrap, and machine availability across representative jobs. A faster weld may not improve output if loading or inspection becomes the bottleneck. For a practical payback estimate, divide the full installed cost by annual net savings, including labor changes, reduced rework, and added maintenance. Keep assumptions visible. They are often the weakest part.
Run a pilot. For example, measure the same job for several weeks, including awkward batches and setup changes. If a cell appears to save 20 seconds per part, confirm that gain on real shifts; small delays add up. Do not treat projected labor savings as cash savings unless staffing or capacity actually changes. I would question any estimate that ignores downtime. Your first calculation may be wrong, and that is useful: revise it with production data before committing.
How to Choose the Best Welding Automation in 2026 - Calculate Total Cost and Expected Productivity Gains
Five-year planning comparison for a single-shift operation. Figures below are illustrative model inputs—not supplier quotations or guaranteed industry benchmarks. Replace them with facility data and written integration quotes before making an investment decision.
| Production option |
Initial investment |
Annual operating cost |
Estimated good assemblies per year |
Five-year total cost of ownership |
Additional assemblies vs. manual |
Simple payback vs. manual |
| Manual welding baseline |
$10,000 |
$68,000 / year |
1,000 |
$350,000 |
— |
Baseline |
| Collaborative robot welding cell |
$85,000 |
$40,000 / year |
1,400 |
$285,000 |
+400 / year |
About 1.9 years |
| Industrial robotic welding cell |
$250,000 |
$49,000 / year |
2,000 |
$495,000 |
+1,000 / year |
About 4.9 years |
| Dedicated high-volume automated line |
$500,000 |
$63,000 / year |
2,800 |
$815,000 |
+1,800 / year |
About 8.3 years |
Model assumptions: 2,000 scheduled production hours per year; estimated output represents accepted assemblies, not arc-on hours. Annual operating cost is modeled as labor, welding consumables, maintenance, and routine support. Initial investment includes equipment and estimated integration.
Calculation method: Five-year total cost of ownership = initial investment + (annual operating cost × 5). Simple payback = (automated option investment − manual baseline investment) ÷ annual benefit. Annual benefit = manual operating cost − automated operating cost + additional annual assemblies × assumed contribution margin of $30 per assembly.
Important: Payback assumes added production can be sold and that quality, staffing, uptime, safety requirements, floor space, and changeover needs are adequately addressed. It excludes financing, taxes, discounting, and residual value. Validate cycle times and annual demand with a production trial and use your own fully burdened labor and contribution-margin figures.
Select a Vendor and Plan System Implementation
Choosing a welding automation vendor starts with your actual parts, not a polished demonstration. Ask vendors to test representative joints, including awkward corners and small variations in fit-up. Watch the full cycle: loading, clamping, welding, inspection, and changeover. A fast weld means little if operators wait for fixtures or correct frequent misalignment. Request sample quality records, maintenance schedules, training plans, and clear response times for service. Check how the proposed cell will connect with your existing power, ventilation, floor space, and production tracking.
Tips: Bring several real parts to a trial. Measure cycle time and rework, not just arc-on time. Ask who owns fixture changes and robot programming after installation. Small details matter.
Plan implementation around people and production. Start with one repeatable job, then run the cell beside the current process until quality and uptime are steady. Record weld dimensions, defects, downtime, and operator adjustments during each shift. Set acceptance criteria before delivery, and assign named owners for training, safety checks, and maintenance. Leave space for commissioning changes; cable routes and fixture access often look simpler on a drawing. Automation will not erase inconsistent joint preparation. That part is easy to underestimate. Review results with welders and supervisors after the first month, then adjust the work instructions and expansion plan.