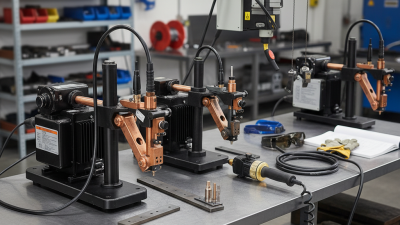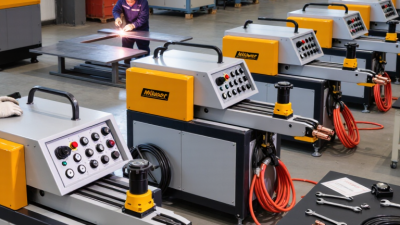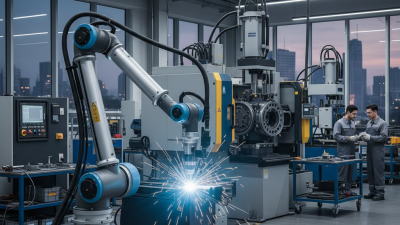
A miller spot welder joins overlapping metal sheets by pressing them between copper electrodes and sending a controlled electrical current through the contact point. The resulting heat fuses the sheets locally. No filler metal. No long bead. The process suits thin steel panels, brackets, enclosures, and automotive body repairs where a compact joint matters more than a continuous seam. Operators must still match pressure, current, and weld time to the material. A small setup error can leave a weak mark—or burn through thin sheet.
The International Energy Agency’s Global EV Outlook 2025 reports that electric-car sales exceeded 17 million worldwide in 2024, representing more than one in five cars sold. That figure reflects a changing vehicle-manufacturing landscape, where joining methods remain important across body and component production. For a practical welding perspective, Dr. John C. Lippold, a welding metallurgy expert, is a relevant authority on how process conditions affect joint quality. I could not verify a verbatim statement from him specifically about Miller spot welders, so I will not invent one. The principle is straightforward: control the heat, pressure, and timing. A spot weld looks simple. Its reliability is not. This guide explains what a Miller spot welder is used for, where it performs well, and what to check before making the first weld.
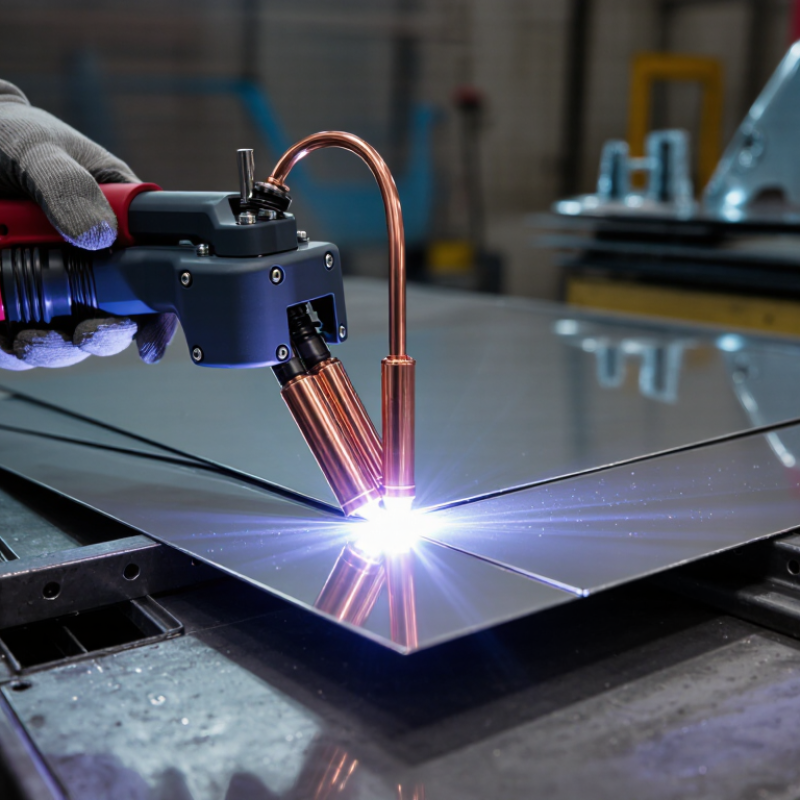
A spot welder joins overlapping metal sheets by pressing them between two copper-alloy electrodes. Electrical current passes through the contact area, creating heat where the sheets meet. The pressure and heat form a small fused zone, often called a weld nugget. No filler rod is normally needed. The result is a localized joint, not a continuous seam.
This process is commonly used on thin steel panels, appliance housings, and other sheet-metal parts that need quick, repeatable connections. Operators set the electrode force, current, and weld time to suit the material and thickness. Too little heat may leave a weak bond; too much can mark or distort the surface. Fit matters, too. Dust, coatings, or uneven gaps can affect consistency. It is not magic. A neat-looking spot can still conceal a poor joint, so sample testing and regular inspection help confirm quality. Small details matter. For thicker sections or metals with different properties, another joining method may be more suitable.
Resistance spot welding joins overlapping metal sheets by clamping them between copper-alloy electrodes. A controlled electrical current passes through the contact area, where resistance creates heat. The metal briefly melts at the interface, forming a small weld nugget. Pressure remains in place as the metal cools and solidifies. That pressure matters.
A typical cycle includes squeeze time, current time, and hold time. The operator aligns the sheets, closes the electrodes, and applies a brief current pulse. Too little heat may produce a weak bond; too much can cause molten metal to spatter, leave deep marks, or wear the electrodes. Clean surfaces and a close fit help keep results consistent. Thin steel sheet is common, but material type and thickness affect the settings. No single setting works everywhere. Test welds can be peeled or sectioned to inspect the bond, then the parameters adjusted. Even so, a neat-looking surface does not always prove a strong weld. Electrode alignment, cooling, and surface coatings can all change the result. The process seems simple, but repeatability takes attention—and sometimes a second look.
Spot welding works best on overlapping sheets that can be clamped tightly between two electrodes. Low-carbon steel is a common choice because it forms a reliable weld with suitable current, pressure, and timing. Stainless steel can also be spot welded, though its resistance and surface condition may call for different settings.
Fit matters. Thin sheet metal is usually more suitable than thick plate, since the electrodes must deliver heat to a small contact area. Clean, flat edges help keep the weld consistent. Oil, heavy scale, paint, or a gap between sheets can weaken the joint. Coated metals need extra care: coatings can affect weld quality and may produce hazardous fumes when heated, so follow the material and equipment safety guidance.
Aluminum can be spot welded, but its high electrical and thermal conductivity, along with its oxide layer, makes the process less forgiving. It often requires equipment and settings suited to the alloy and thickness. Not every alloy. Castings, bulky parts, and uneven assemblies are generally poor candidates for ordinary sheet-metal spot welding. A practical check is to make test welds on matching offcuts and inspect the nugget or perform a destructive test. This is not a universal recipe; even two sheets of similar thickness can behave differently when their surfaces or fit change.
A spot welder joins overlapping metal sheets by squeezing them between copper electrodes and passing current through the contact point. In repair work, it can reconnect thin body panels or patch small areas without laying a long, visible bead. The panels need clean contact and firm alignment. Small gaps hurt. A test weld on matching scrap helps confirm the settings before work begins.
In fabrication shops, spot welding suits enclosures, trays, brackets, and other sheet-metal assemblies. A worker can position a part, clamp the joint, and make repeatable welds along a seam. This is handy when access to the opposite side is limited, though the electrode arms still need room to reach the joint. Fit-up matters. Uneven pressure or dirty metal can produce weak, inconsistent welds.
Manufacturers use spot welders for repeated joints in products such as cabinets, appliance panels, and metal furniture. Fixtures help keep parts in place and maintain consistent spacing, while routine checks catch worn electrodes or changes in weld quality. Production speed is useful, but it should not replace inspection. Material type, sheet thickness, and machine capacity all affect the result. For critical assemblies, operators should follow approved procedures and verify welds with suitable tests. Some joints simply need a different process.
| Work Area | Common Application | Typical Materials | Why Spot Welding Is Used | Practical Considerations |
|---|---|---|---|---|
| Automotive repair | Joining overlapping sheet-metal panels, such as replacement body sections and brackets | Automotive-grade steel and, with suitable equipment and settings, some aluminum sheet | Creates localized joints similar to the resistance spot welds commonly used in vehicle body construction | Check the vehicle repair procedure, access for the electrodes, material type, and required weld locations. Use appropriate protection when removing coatings. |
| Metal fabrication | Assembling sheet-metal enclosures, covers, guards, and small brackets | Overlapping low-carbon steel or stainless-steel sheet | Makes repeatable point joints without adding filler metal, which can suit thin-sheet assemblies | The sheets need to overlap and fit closely. Electrode shape, force, current, and weld time must suit the material and combined thickness. |
| Manufacturing | Repeat joining of sheet-metal parts in appliances, cabinets, and light-gauge components | Commonly steel sheet; other conductive metals may require specialized settings and equipment | Short, localized weld cycles can support consistent production when parts and settings are controlled | Production quality depends on consistent part fit, clean contact areas, electrode maintenance, and scheduled inspection of welds. |
| HVAC and ductwork | Joining sheet-metal seams, tabs, and reinforcing pieces where a lap joint is suitable | Thin galvanized or uncoated steel sheet, depending on the job and equipment | Can make localized joints on accessible overlapping sections without a continuous bead | A spot weld is not automatically airtight or watertight; use a suitable seam design or sealing method where required. Follow precautions for coated metals. |
| Small-part assembly | Attaching tabs, clips, and small reinforcements to sheet-metal parts | Compatible conductive sheet or strip materials in overlapping configurations | Can provide a compact joint with little added material and limited heat spread compared with some broader-heat processes | Confirm that the electrodes can reach both sides of the joint and that the part thickness is within the machine’s rated capacity. |
General note: Resistance spot welding is primarily suited to overlapping conductive sheet materials. Usable thickness, material combinations, and weld quality depend on the machine, electrodes, joint access, and procedure.
A spot welder joins overlapping metal sheets by pressing them between two electrodes and passing a brief electric current through the contact point. Setup starts with clean, bare metal; paint, oil, and rust can weaken the weld or make results inconsistent. Align the sheets, check that the electrodes meet squarely, and select settings suited to the material and combined thickness. Follow the machine’s manual rather than relying on a setting that worked on a different job. A test coupon helps reveal weak joints before you work on a finished part.
Wear eye protection and suitable work clothing, and keep hands clear of the electrode arms. The metal and electrodes can stay hot after a weld. Keep the work area dry and uncluttered, and use appropriate ventilation when the material or nearby residue could produce fumes. Small details matter. Inspect cables, connections, and electrode tips before use; worn tips can leave uneven marks or unreliable joints.
A spot welder is best suited to accessible, overlapping conductive sheets. It may not work well on thick stock, coated surfaces, or joints that cannot be reached from both sides. Even a neat-looking spot can be weak, so check sample welds for consistency. I have found that setup takes patience, and a rushed adjustment is easy to regret.