Why Choose a Spot Welder for Your Business?
A spot welder can turn a repetitive joining task into a quick, controlled operation. For a small fabrication shop, that may mean joining thin steel brackets at a steady bench-side station. On an automotive line, it can mean producing consistent welds across thousands of assemblies. The right choice depends on the work, not the machine’s headline power.
Dr. John C. Lippold is a respected welding metallurgy researcher. A practical paraphrase of a sound process-selection principle is: “Match the process to the material, joint, and production rhythm.” This is an editorial paraphrase, not a verified direct quotation. The distinction matters. A reliable purchase decision should be grounded in test welds, application requirements, and advice from qualified welding professionals.
A spot welder may suit businesses that need repeatable joins, short cycle times, and less reliance on filler material. It is not automatically the best fit for every part. Electrode access, sheet thickness, surface condition, and required weld strength all deserve attention. Real parts vary. A sample weld can reveal problems that a brochure cannot.
This introduction outlines the practical reasons businesses consider spot welding, the costs and limitations to weigh, and the questions to ask before investing. Expect concrete checks: the fit of the electrodes, the ease of setting weld parameters, and the consistency of joints across a production run. Small details count. A machine earns its place when it delivers dependable results on the work your business actually makes.
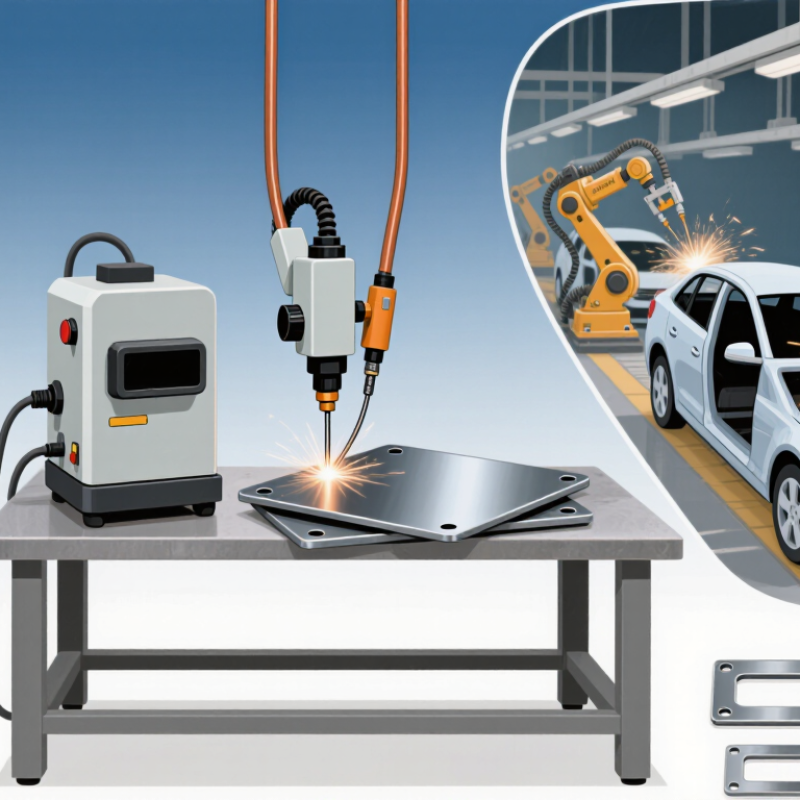
What a Spot Welder Is and How the Process Works
A spot welder joins overlapping metal sheets by pressing them between two electrodes. The electrodes apply force while an electrical current passes through the contact area. Resistance to that current creates heat, forming a small molten zone, or weld nugget. The machine then holds the sheets together as the nugget cools and solidifies. No filler metal is needed. The basic sequence is squeeze, weld, hold, and release, as described in the resistance-welding section of the AWS Welding Handbook. Small details matter: surface condition, sheet thickness, electrode alignment, and pressure can all affect the joint.
TWI’s technical guidance on resistance spot welding reports currents commonly ranging from about 1,000 to 100,000 amperes, with weld times often around 0.1 to 1 second. These are broad operating ranges, not ready-made settings; material and equipment change the required values. In production, operators can inspect sample welds and monitor electrode wear to catch problems early. A clean-looking surface alone proves little. That part is easy to overlook. For a business, understanding the process helps teams choose suitable equipment and build a repeatable setup, though trial runs may still reveal unexpected variation.
Why Choose a Spot Welder for Your Business?
What a Spot Welder Is and How the Process Works
A spot welder joins overlapping metal sheets by pressing them between electrodes and passing electric current through the contact area. The electrodes clamp the sheets before current flows and keep them together briefly afterward as the weld cools. This chart is a process-state schematic, not a time-scaled production cycle.
Which Materials and Products Spot Welding Can Join
Spot welding joins conductive metal sheets by pressing them between two electrodes and passing a brief electric current through the contact point. The heat forms a small fused area, often called a weld nugget. The process suits overlapping sheets, not every joint works.
Low-carbon steel is a common choice because it welds consistently across many sheet thicknesses. Stainless steel can also be joined, though its electrical resistance and surface condition affect the settings. Galvanized steel is weldable, but its coating can influence electrode wear and weld quality. Aluminum is possible too, yet it needs carefully controlled current and clean surfaces. Copper is more challenging because it conducts heat so quickly.
The method appears in car body panels, metal cabinets, appliance housings, and wire mesh products. It can also join thin metal brackets and layered sheet assemblies. For repeatable results, operators check sheet thickness, fit, electrode shape, and weld spacing. A loose fit can leave a weak or uneven spot. A test weld on sample material helps reveal problems before production begins. Even with good settings, dissimilar metals may be difficult to join reliably, so each material combination deserves a practical trial.
How Spot Welding Improves Production Speed and Consistency
A spot welder can make repeat work faster by joining overlapping metal sheets with a timed squeeze and electrical current. Operators position parts between copper electrodes, trigger the cycle, then move to the next joint. There is no filler wire to feed, and many assemblies need little cleanup. On a production bench, that can mean fewer pauses and a steadier rhythm. Small differences still matter: sheet thickness, surface condition, electrode pressure, and weld time all affect the result. Consistency takes setup.
With suitable settings and well-maintained electrodes, each weld can follow a repeatable cycle. This helps reduce variation across batches, especially for brackets, enclosures, and other thin-sheet parts. A defined process can also make training easier than asking workers to judge every joint by eye. But speed should not outrun inspection. A strong-looking mark does not prove a sound weld; sample testing and routine checks remain important. Even good equipment drifts.
Tips: Keep mating surfaces clean, check electrode tips for wear, and record settings by material and thickness. Run test coupons after any change. If welds peel apart or show heavy discoloration, pause and review the setup instead of increasing current blindly. A short log saves guesswork later.
Why Choose a Spot Welder for Your Business? - How Spot Welding Improves Production Speed and Consistency
| Production factor |
Typical operating data |
Potential production benefit |
What to monitor |
| Weld time |
A resistance-weld current pulse for steel may last roughly 5–20 cycles (about 0.10–0.40 seconds on a 50 Hz supply). |
Short weld pulses can support high output when part loading, positioning, and handling are also efficient. |
Measure the complete part-to-part cycle time, not just the current pulse. |
| Weld current |
Many steel spot-welding applications use currents in the several-kiloampere range; settings depend on material, thickness, electrode condition, and the machine. |
A controlled current profile helps deliver repeatable heat at the joint. |
Track current and review weld schedules when materials or stack-ups change. |
| Electrode force |
Force is set for the application and machine; several kilonewtons are common in industrial sheet-metal welding. |
Consistent force helps stabilize contact between sheets and electrodes from weld to weld. |
Check force calibration, alignment, and electrode wear. |
| Part positioning |
Fixtures and repeatable electrode access determine how quickly and accurately parts can be presented to the weld area. |
Purpose-built fixtures can reduce repositioning and help maintain consistent weld locations. |
Verify fixture repeatability and access to every specified weld point. |
| Process consistency |
Weld quality depends on the combined settings for current, time, force, electrode geometry, and workpiece condition. |
A documented weld schedule and routine checks make production results easier to repeat across shifts. |
Use an approved inspection plan, such as visual checks and periodic destructive testing where appropriate. |
| Consumables and upkeep |
Electrode tips gradually wear and may require dressing or replacement; maintenance intervals depend on the application. |
Planned maintenance helps prevent avoidable quality variation and unplanned production stops. |
Record tip condition, weld counts, maintenance actions, and quality results. |
|
Note: Values and operating ranges are general engineering guidance, not guaranteed production specifications. Actual settings and throughput depend on the material, sheet stack-up, equipment, tooling, and validated weld procedure.
|
What Costs and Quality Benefits Businesses Can Expect
A spot welder can lower per-joint costs when a business repeatedly joins thin metal parts. TWI’s resistance-welding guidance gives typical weld times of about 0.1 to 1 second. For 2,000 joints, that equals roughly 3 to 33 minutes of welding time, before part handling and inspection. That matters. The process usually needs no filler wire or shielding gas, but electrodes wear and require replacement. Electricity, cooling, setup, and maintenance belong in the cost calculation too.
Quality gains come from controlling current, pressure, and weld time. A stable setup can produce consistent joints with little post-weld cleanup. The American Welding Society’s D8.1M specification provides acceptance criteria for resistance spot welds in automotive steel applications; it is a useful reference, not a universal standard for every product. A spot welder cannot compensate for oily surfaces, poor alignment, or worn electrodes. Small process errors can still create weak joints.
Tips: Track electrode life and inspect sample welds during production. Record settings by material thickness, then test changes before running a full batch. That takes time. It can also prevent costly rework. A machine’s purchase price is only part of the decision; compare labor, consumables, downtime, and scrap against your actual production volume.
How to Choose a Spot Welder for Your Business Needs
Choosing a spot welder starts with the work it must handle, not its advertised power.
List your materials, their thickness, and the joint sizes you produce each day. A welder suited to thin sheet may struggle with thicker assemblies or frequent production runs. Match the machine’s duty cycle to your busiest shifts, and check whether your electrical supply can support its requirements.
Look closely at electrode access and adjustment. A compact frame may fit a crowded bench, but awkward access can slow loading and make weld placement inconsistent. Check electrode replacement, cooling needs, and available service support before buying. Small details matter. Ask whether settings can be adjusted for different materials and whether safety features suit your operators’ workflow. Practical checks beat guesswork.
If possible, test the machine with your actual parts. Examine the welds, then repeat them after several cycles; a single clean sample proves little. Note setup time, operator comfort, and how often adjustments are needed. That test takes effort, but it can expose a mismatch early. Also consider training and routine maintenance, not just purchase price. The lowest-cost option may become expensive if it slows production or needs frequent attention. And sometimes the simplest setup is the one your team will use consistently.